Month: February 2017

  • What is that?

    What is that?

    Every now and then while driving on a main state road in my town I see this beat-up looking truck. The fact that it is a little rough around the edges didn’t make it stand out all that much. It was the letters on the front grill. Hand painted block letters on a piece of wood that didn’t make much sense, oh wait, they’re backwards (like the front of an ambulance)! OK, look again, but now it’s gone. Grrr

    A week or so later,same deal,old truck what’s wrong with the grill, ooh, it’s that truck, letters are backwards, right, quick, read it, what does it say??? sway? I don’t know…

    A week, a few days, whenever later, HEY, there’s that truck! It’s a web address! www.TimsWay.net Huh, that’s kind of intriguing…wonder what’s so clever about Tim’s way?

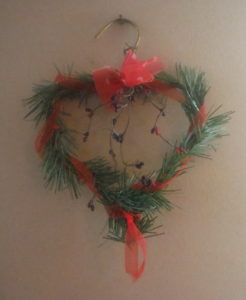
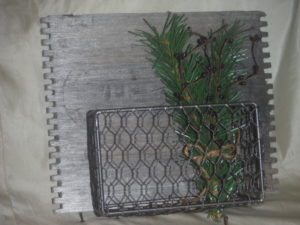
    Yesterday: Oh yeah! TimsWay.net, I forgot to look that up, Must remember to find out about this. It turns out to be a modest little website,and that’s when I noticed the first thing.  Ohhhhh, it’s Tim Sway! Mr. Sway is a *very* talented and modest man from what I can tell. He transforms junk into wonderful works of art.  I watched his video transforming reclaimed barn wood into a lovely chest. He speeds through the entire process. All the steps and detail, just inspiring. Each side has staggered pieces which when joined together create a nice sturdy corner, everything fit together perfectly. My favorite part, that would generally go unnoticed are the little feet. He tapered them so they aren’t just chunky little bits.

    Other items include wall sconces made from the turn signals from a Volkswagen Beetle. They are not my decorating style, but I love them! I appreciate his vision in creating them. There is no doubt, many more items he has created, and someday I will delve further in, but for now I wanted to share this with you.

    Anything to encourage anyone to reduce, reuse and recycle! Do your part!  <3


  • Opening the store

    Recently, I attended a webinar on how to create your own blog/website. Of course, I already have one, but it could sure use some tweaks.

    One of the improvements I have added since then was my storefront, which I believe is quasi-open at the moment. There are products up for sale, yet the portion that accepts payment isn’t complete. Great…

    Well, if anyone reads this bizarre post, please browse around the store and let me know what you think of my offerings. Maybe you will love something that was created with love. Any purchases allow this little gem of a blog keep going. So, many thanks in advance for your support.

  • Dismantling the tree

    Dismantling the tree

    As I mentioned in my February 1, 2017 post, I purchased an artificial Christmas tree in order to make some crafts. After realizing how big the tree was to store, a need to condense the material was realized. Some of the larger branches were left intact to use as is. Most of the branches were deconstructed to make eventual use of them easier.

    Initially, I had used wire cutters to remove a few twigs from the branch. Not liking the sharp ends, I chose to release the twigs from their threaded prison. The first one was horrible, the threads (there are 2 for each branch) would get easily tangled in the needles. My scissors were kept close by! Finally. the end of the branch, and I had a nice pile of twigs ready to be used for my crafts.

    It didn’t take long to realize that I need to start at the very end, the part that would be toward the center trunk.

    OH! That color-coded label is a sticker holding the thread ends to the branch. I may eventually post a video of the process, but until then these pictures of the process may help you.

    Here is one of the small branches. See the yellow tag? That’s how you know where to place it on the tree. It’s also just a sticker holding the threads wrapped around the metal bar.
    To begin deconstruction, tear off the sticker. I imagine all trees are built the same way, therefore they likely all are built by wrapping two threads around each branch.
    As you unravel more and more be sure to not let the threads tangle in the branches, trust me, it gets ugly quick! Hard as I tried, it still occasionally gets caught, just catch it as soon as possible.
    Here, enough has been unraveled that a few twigs are now loose – SUCCESS! Keep going, being careful not to tangle those threads.
    When you are done, you will have a pile of usable material. This small branch yielded 16 twigs, nasty, nylon, grabby thread, and a metal bar. After doing a bunch of these, you will understand my dislike of the thread. 😉


    Some branches were left intact to use for larger projects, two were bent to make a display tree for some crafts (pictures to come), the rest have been reduced to a large pile of twigs. <insert evil laugh> There is one remaining branch. In the near future I will unwind that one while making a video to help you see how easy it is. It may have already been done save for the fact that the weekend I spent on the rest of the tree injured my shoulder.  It’s been 3 weeks, it’s almost completely healed. (Pace yourself if you plan to do an entire tree, it didn’t hurt *at all* while I did it.)

    Now it’s time for the real fun! Making your projects using evergreen twigs! Here are some things I have made with them.


    Valentine wreath, small ribbon.
    Valentine wreath, small raffia.
    Wire basket on vintage wood board.
    Vertical wreath with large bow and ornaments.
  • It’s February?

    It’s February?

    How in the world did that happen? Good grief!

    I have been busy, that’s all I know. Sure, I suppose I could have squeezed in a blog post here and there, but about what? Well, now I have plenty to blog about. Let’s hope I can find the balance between work, being mom, moving forward with our homestead plans, crafting, AND the blog.

    Well, since it’s February let me share some Valentine’s crafts I’ve made recently. Some cute wreaths. They are small and utilize recycled/reused items. For Christmas 2015 I had used some boughs from an artificial Christmas tree to make a lovely hanging decoration. It looks much nicer in person than the photos show. As a result of that craft, I imagined many other lovely crafts could be made from the lovely branches. Then, as luck would have it, I discovered someone selling their 7′ tree on one of those Facebook tag sale pages. I met her and only then realized, “What am I doing?? Now I need to store this entire tree somewhere,ugh.” Well, it is done. Better get started. Initially I had planned to make more of those lovely large decorations, but then I would have to store those as well. This is not getting better. Necessity is the mother of invention… so, first things first, eliminate as much of the tree that I don’t need. The center rod, nope don’t need it, the base, uh-uh, the metal rods to which each small branch is attached – gone…but wait. Dang, now I know what I can do with them.

    Eventually, when I begin selling my goods I need a display. What better to display Christmas wares than on a Christmas tree? You will see that project later, I haven’t taken pictures yet. The branches that were not selected for that need to be dismantled, see it in this post.

    With those little twigs, a wire hanger (everyone has those, right?), a few embellishments of your choice, and some simple tools: pliers, glue gun. DONE! See that project here.

Verified by MonsterInsights